Thursday, September 8, 2011

Easy Spring Rolls


So we haven't blogged in a while to say the least! But this recipe was worth blogging! One day while shopping around the grocery I found "spring roll wrappers" I was actually thinking about buying some seaweed for sushi but decided I wasn't quite that adventurous. So I brought home the wrappers and decided to figure out what we could stuff in these yummy packages. Below you'll find the "exact" measurements of things you'll need and some pictures to help you plug along as you create your own spring roll concoctions.

1 Medium Sized Yellow Onion (finely chopped)
1 Cup Green Onions (finely chopped)
2 Tablespoons of Soy Sauce
2 Table spoons of butter or butter substitute
1 LB of Salmon (we've also used ground pork, ground turkey, and ground beef which are equally good)
1 Cup Shaved Carrots
1 Table Spoon of Olive Oil
1 Cup of White Rice


In a medium sized heat up the oil. Once warmed add the carrots and onions and good on medium for about 5 minutes (or until the onions become translucent & Carrots slightly soften) Then add 1 table spoon of soy sauce, butter and the salmon. Cook the salmon through breaking it up into pieces as it cooks. When the salmon is cooked through add the additional tablespoon of soy and the green onions. Let the mixture sit on low for 5 to 10 minutes stirring consistently.


In another pan we cooked 1 cup of white rice as directed.

Get your: Spring Roll Wrappers, food mixture, and rice together


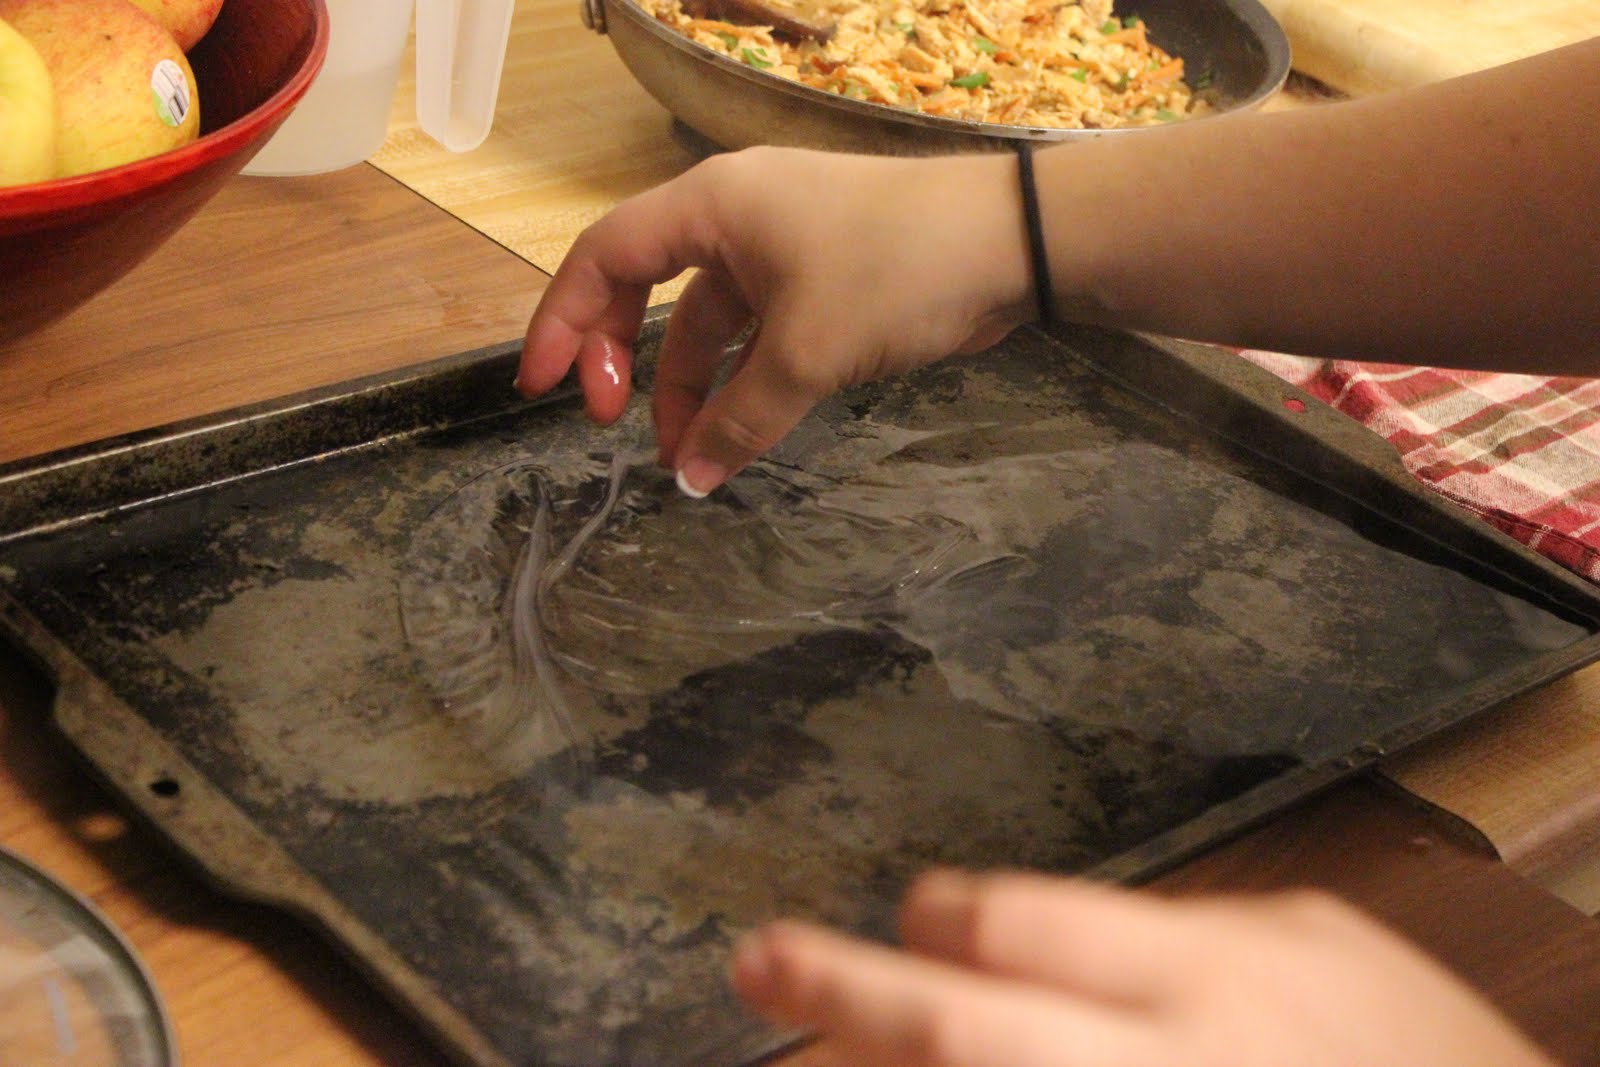
Fill a medium sized oven pan or tray full of boiling water:


Immerse your wrappers in the water until they are translucent:


Lightly pad the wrapper dry in a towel:


Add some of your meat mixture, and some of the rice to the center of the wrapper:


And roll:


Cat's even love these yummy spring rolls!


And the Final Delicious Product!


Saturday, May 8, 2010

The Abrandall Burger and Julie's Pasta Salad

Sorry for the delay in posting blog entries. Exams, chess, and travel have kept us busy. We will hopefully be adding at least one entry a week from now on.


If you're looking for a simple easy summer cookout feast this is your solution! The Abrandall Burger and Julie's Pasta Salad will fill your belly up anytime.

You will need:

For the delicious pasta salad:

1 Box of Pasta
2 8oz Cans of Albacore Tuna fish
2 Cups of Mayonnaise
1 Can of Peas
1 tablespoon of salt

and

for the turkey burgers:

Sliced Bread (two slices per sandwich)
1lb ground turkey
1 cup of chopped green onions
1/2 cup Monterrey jack cheese
1/2 cup Cheddar cheese

Optional toppings for the burgers would include: Lettuce, Tomato, Ketchup, Mayonnaise, Mustard, BBQ Sauce, Onions, and Bacon.

To make the Pasta Salad:

Cook the pasta until desired tenderness. At the same time in a small pot heat the peas until warm and soft. In a large bowl mix the tuna, mayonnaise and salt and mix thoroughly. Then mix in the drained pasta and peas and again mix thoroughly. Chill and Serve and you have delicious tuna salad pasta for lunch or dinner with plenty of leftovers.

To make the Burgers:

Combine the cheese and ground turkey in a mixing bowl and smush the ingredients together. Then mix in the chopped onions and a tablespoon of salt. Use a medium size ramekin to form the burgers and push them flat. Grill until cooked all the way through with no pink in the middle. Toast the pieces of toast and serve with the desired toppings.

Thursday, May 6, 2010

Steven's Chess Cake 2


Cake #1
The Good: The cake itself was delicious
The Bad: The edges decided to come out of the pan while the middle wanted to stay in the pan.
With no more cake mix, no more eggs and no more patience I had to go to the store…
Cake #2
The Bad: This time the cake batter didn’t taste nearly as good and for some unknown reason, and this cake decided it didn’t want to rise.
The Good: At least the Cake Came out of the pan…
Boy do these cakes have a mind of their own. I decided just to lay out my plan for the cake, and realized I didn’t have the right measurements with this new cake. 7x12 wouldn’t fit the 9x13 size I needed for the pieces! As I started freak out and almost break down, Steven came in to rescue me. (Keep in mind to this point I tried to keep the cake a surprise) I caved in and let him help me solve the measurement problem. We “glued” some of Cake #1 onto Cake #2 and made it the appropriate size. Next I rolled out the fondant which covered the cake mistake and cut 32 little black squares. After the squares were finally on the board and it looked pretty nice I decide to go to bed and finish in the morning.
The following day I placed the pieces on top of the cake and was finally done. You would never know how many problems I had! the cake looked FABI!!! Thanks to Dustin for teaching me fondant and Steven for rescuing me. Who knows what kind of cake he’ll ask for next year. But with this cake behind me I’ll be ready for anything.

Wednesday, May 5, 2010

Stevens Birthday Chess Cake Part I


Oh the adventure this lovely cake gave me.

When I asked Steven what kind of birthday cake he wanted I figured that he would say one of his favorites. Maybe: apple pie, Cheesecake or an ice cream cake. Boy was I wrong. Out of his mouth came, A CHESS CAKE… Wanting to make him happy and not knowing what I was getting myself into I agreed. Hey I enjoy being creative!
We were having Steven’s birthday party the weekend of April 10th. At the end of March we began to look for chocolate molds and chocolate, and found everything we thought we would need. After a suggestion from my boss I recalculated my plan and decided to buy new supplies from the local cake shop. Of course they were only open twice a week and I heard stories of a cranky old owner. Despite arriving ten minutes before close, the owner was nice and $20.00 later I headed home.
To make things less time consuming as the party loomed I made the pieces a week early…. The problem was trying to figure out how I would stick the two piece halves together. I tried tooth picks, but after all the milk chocolate pieces had set, I realized that was a bad idea so I broke them all off. Later that day my friend Dustin! came over to teach me how to make the fondant for the chess squares. Thank God he’s a great teacher! We made delicious fondant one batch for the white squares, and one for the black.
I thought the cake would be the easiest part but man I was wrong!

Cheesy Gordita Adventure


Last night we decided to attempt to duplicate the incredible Taco Bell Cheesy Gordita Crunch. We had attempted this feat in the past, without much success (using the taco bell package straight from the shelf). This time the attempt again wasn't as smooth as we had hoped. Though they looked delicious it's seemingly impossible to duplicate the soft, chewy, crunchy nature that is The Cheesy Gordita. With a soft exterior pita like shell, followed by a layer of cheese sauce, followed by a hard shell filled with the contents of a typical meaty cheesy taco, Taco Bell does it right. We can only chase their perfection of the beast, or just accept that we must pay $2.99 for this delicacy.


Monday, May 3, 2010

Dinner Tonight


Today's Creation was based on The Kraft Springtime Pasta Toss

http://www.kraftrecipes.com/recipes/springtime-pasta-toss-74591.aspx


We are took it up a notch By using:
2 Large grilled chicken breast
1 Box of bow tie pasta
1 Can of Green Peas
1/2 cup of fresh chopped green onions
1/2 cup of ranch dressing
1/2 cup of softened garlic and herb cream cheese
1/2 Cup of Italian mixed cheeses.
1/2 Cup of shredded Parmesan

-First we grilled the chicken breast and chopped it into bit size pieces.
-We cooked the pasta until tender, and at the same time warmed the peas and chopped onions together in a separate pan.
-When the veggies were warmed through we added the cream cheese and ranch.
-We drained the pasta and mixed the sauce mixture with the pasta in the same pan used to cook the pasta.
-We then added the chicken and 1/4 cup of the cheese and 1/4 cup of Parmesan and mixed well
-Finally we transferred the mixture to a baking dish and topped it with the remaining cheese and baked it on 300 for 15 minutes (or until cheese is melted) and it was ready to serve

New Recipe Blog

This Blog will serve as a virtual cookbook of Julie and my creations and favorites. We will enter in our weekly menu and rate the new recipes that we've made that week.